 Save to Pinterest
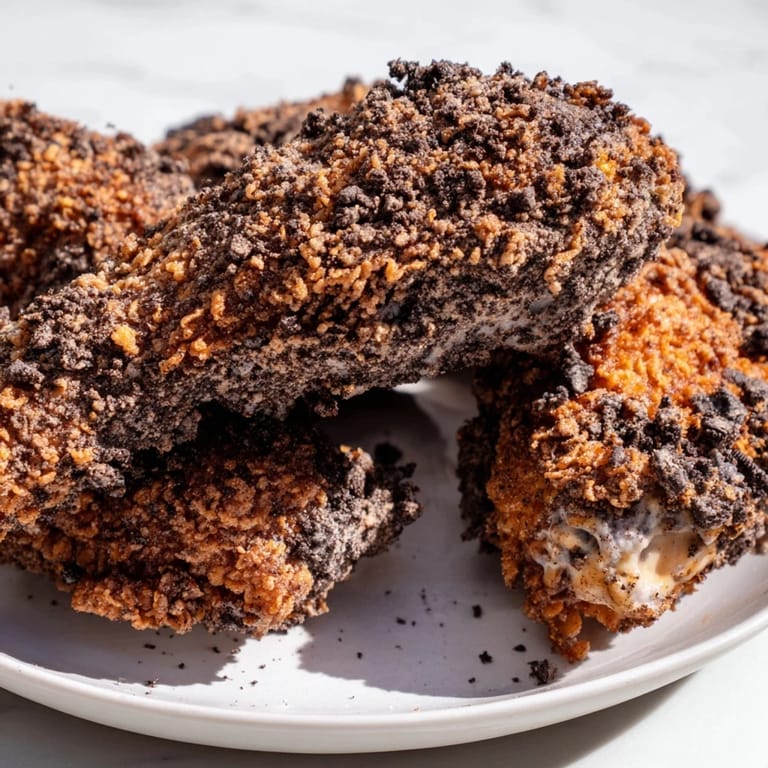
 I discovered this recipe at three in the morning, scrolling through my phone while a batch of something else cooled on the counter. The idea of Oreo-crusted chicken felt ridiculous at first, then strangely genius. My first attempt came together hastily on a Wednesday night when friends texted that they were coming over, and honestly, that's when the best kitchen experiments happen. The moment those golden tenders hit the oil for the second time and emerged with a shattered, sweet-and-salty shell, I knew I'd found something special.
I made these for a small group of people who thought I was joking when I described them. Watching their faces when they bit through that Oreo crust to find tender, seasoned chicken underneath was worth every moment of prep work. It became the kind of dish people ask about weeks later, and I've since made it for my family's game nights and unexpected dinner guests.
Ingredients
- Chicken tenders: Choose ones that are roughly the same thickness so they cook evenly in both frying stages.
- Salt, black pepper, garlic powder: This trio seasons the chicken subtly before any breading happens, which makes a real difference in the final flavor.
- All-purpose flour: The base layer that helps everything stick and fry to golden perfection.
- Eggs and milk: Mix these together to create a binder that's thin enough to coat smoothly but sturdy enough to hold layers together.
- Oreo cookies: Crush them finely, and don't bother removing the cream—it adds richness and helps the coating stick better.
- Vegetable oil: Keep it clean and at a steady temperature, which matters more than you'd think for this double-frying technique.
Tired of Takeout? 🥡
Get 10 meals you can make faster than delivery arrives. Seriously.
One email. No spam. Unsubscribe anytime.
Instructions
- Prep and Season:
- Pat your chicken tenders completely dry with paper towels—moisture is the enemy of crispy coatings. Dust each one with salt, pepper, and garlic powder, letting it sit for a minute so the seasoning clings.
- Set Up Your Station:
- Shallow bowls work better than plates for dredging because you can fully submerge each tender. One bowl gets flour, one gets your egg-milk mixture beaten until smooth.
- Double Dredge:
- Coat each tender in flour first, tap off the excess, then dip into the egg mixture, and back into the flour again. This layering creates that crackly texture you're after.
- Heat Your Oil:
- Use a thermometer—175°C (350°F) is the sweet spot. Too hot and the outside burns before the inside cooks; too cool and you get greasy results.
- First Fry:
- Work in batches so you don't crowd the oil, which drops the temperature and ruins everything. Turn each tender once during cooking so both sides get that golden-brown color, about 5–6 minutes total.
- Rest and Prepare for Round Two:
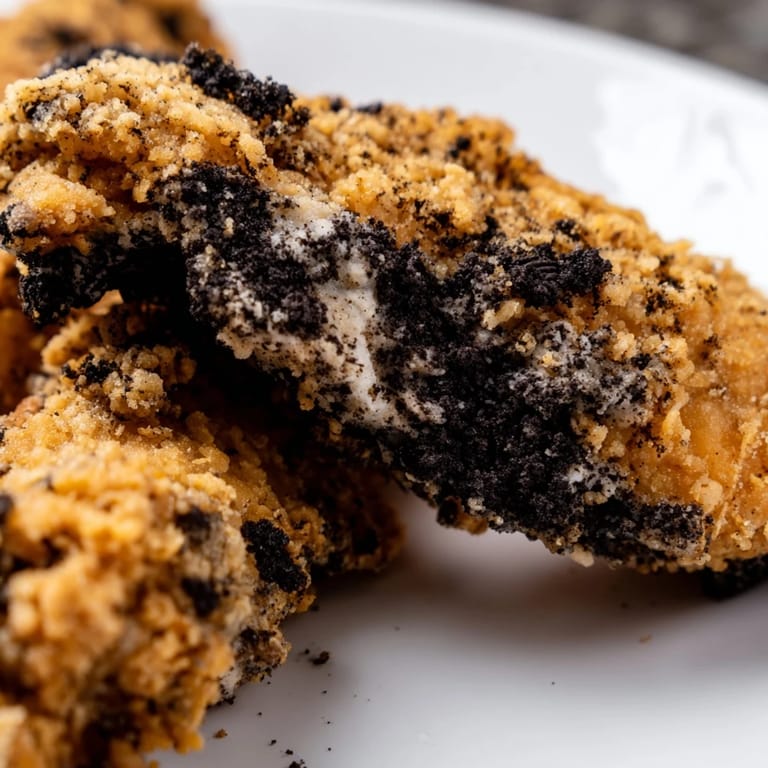
- Let them cool just enough to handle, then dip each warm tender back into the egg mixture and roll through the crushed Oreos. Press gently so the crumbs stick without falling apart.
- Second Fry:
- This is quick—just 1–2 minutes until the Oreo coating turns crispy and smells incredible. Watch carefully because the cookie crumbs can darken fast.
- Final Drain and Serve:
- Fresh paper towels make the difference here; reusing soggy ones defeats the whole purpose.
 Save to Pinterest
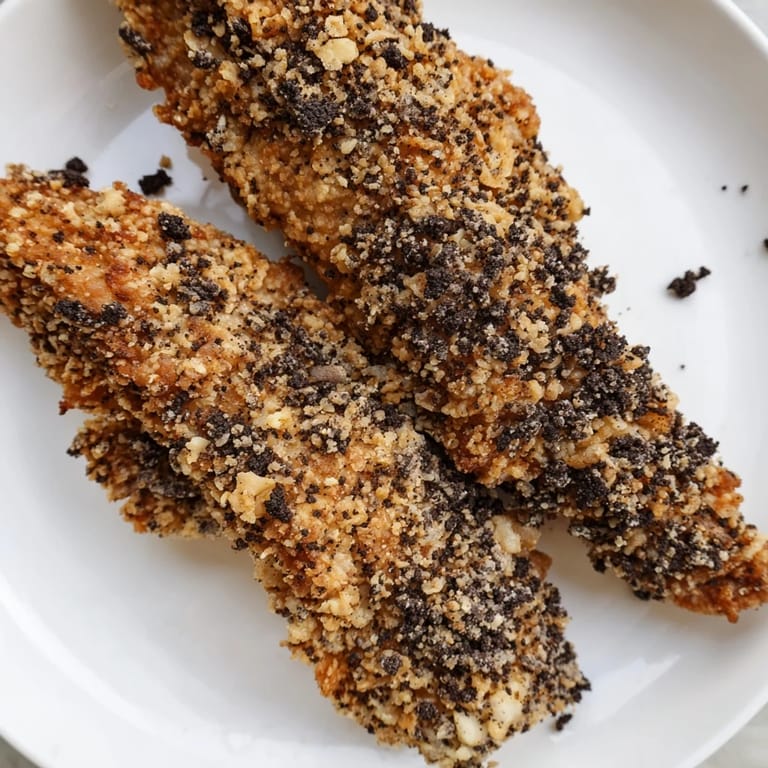
 There's something almost magical about serving these to people who've never had anything like them before. The combination catches them off guard in the best way—sweet, salty, crunchy, and indulgent all at once. It's become the kind of dish that makes people feel like you went above and beyond, even though it's remarkably straightforward.
Flavor Pairing Ideas
These tenders shine alongside drinks that cut through the sweetness. A cold cola works beautifully, as does iced tea or even a light beer if you're serving them to adults. For dipping, sweet chili sauce plays against the Oreo coating in unexpected ways, or try a vanilla cream dip for full indulgence—mix whipped cream with a splash of vanilla extract and a pinch of sugar.
Making Them Your Own
The beauty of this recipe is how flexible it actually is once you understand the technique. I've added cayenne pepper to the flour for heat, swapped in hot sauce mixed with the eggs for a different edge, and even tried crushing chocolate sandwich cookies other than Oreos when I was out. Each version teaches you something about how flavors work together, and honestly, some experiments turn out even better than expected.
Storage and Reheating
These are best eaten immediately while the contrast between crispy coating and warm, juicy chicken is at its peak, but I've learned they keep for about two days in the fridge. To reheat, pop them in a 180°C (350°F) oven for about five minutes instead of microwaving, which keeps the coating from getting soggy.
- Cool them completely before storing so condensation doesn't ruin the crunch.
- If you're making a big batch ahead, fry the first coating, cool them completely, then do the Oreo coating and second fry just before serving.
- Leftover crushed Oreos can be frozen and stay fresh for weeks, so prep them ahead if you're planning multiple batches.
 Save to Pinterest
 This recipe has become one of those dishes I return to whenever I want to feel a little creative in the kitchen without overcomplicating things. It's the kind of food that turns an ordinary weeknight into something memorable.