 Save to Pinterest
 My friend brought back a tin of hojicha powder from Tokyo, and I spent weeks just smelling it—that toasted, almost nutty warmth that somehow feels both grounding and elegant. When she asked what I'd make with it, I didn't hesitate to bake. This cake came together on a quiet afternoon when I wanted something that tasted like a refined café moment but felt entirely plant-based and honest.
I made this for my book club once, and the room went quiet for a moment after everyone took their first bite—not uncomfortable quiet, but the kind where people are genuinely surprised by what they're tasting. Someone asked if it was from a Japanese patisserie, and I got to have that small, satisfying moment of revealing it came from my kitchen.
Ingredients
- Gluten-free all-purpose flour blend: Use one with xanthan gum already mixed in to avoid dense, crumbly results—it makes a genuine difference in how the cake rises and holds together.
- Almond flour: This adds moisture and richness that compensates for the lack of eggs, and it keeps the crumb tender in a way regular flour alone cannot.
- Hojicha powder: Splurge on high-quality here; cheaper versions can taste dusty and bitter instead of that toasted, almost caramel-like warmth you want.
- Apple cider vinegar: Mixed with almond milk, it creates a vegan buttermilk that activates the leavening agents and gives the cake structure and lift.
- Maple syrup: It's your sweetener, and it adds moisture and a subtle depth that refined sugar would miss entirely.
- Coconut oil: Melted and measured carefully, it keeps the cake tender and adds a subtle richness that won't overpower the hojicha.
- Full-fat coconut milk: Refrigerate it overnight so the cream separates from the liquid—this cream is what becomes that cloud-like frosting everyone will ask you about.
Tired of Takeout? 🥡
Get 10 meals you can make faster than delivery arrives. Seriously.
One email. No spam. Unsubscribe anytime.
Instructions
- Set up your space and prepare the pan:
- Preheat your oven to 350°F and line an 8-inch round cake pan with parchment paper, letting it come up the sides. This small step prevents sticking and makes demolding effortless.
- Create your vegan buttermilk:
- Pour almond milk into a small bowl, add apple cider vinegar, and let it sit for about 5 minutes—you'll see it thicken and separate slightly, which is exactly what you want. This mimics the reaction of regular buttermilk and helps your cake rise beautifully.
- Combine the dry ingredients:
- In a large mixing bowl, whisk together the gluten-free flour, almond flour, hojicha powder, baking powder, baking soda, and salt, making sure everything is evenly distributed. Take your time here; you're creating an even base so the hojicha flavor spreads throughout every bite.
- Mix the wet ingredients:
- In another bowl, combine your prepared vegan buttermilk, maple syrup, melted coconut oil, and vanilla extract, stirring until smooth and well blended. The mixture should feel warm and smell wonderful—that's your signal everything is working correctly.
- Bring it together gently:
- Pour the wet mixture into the dry ingredients and stir slowly with a spatula or wooden spoon, just until you don't see streaks of dry flour anymore. Overmixing activates the gluten in your flour blend, making the cake dense and tough, so resist the urge to keep stirring.
- Transfer and bake:
- Pour the batter into your prepared pan and smooth the top with the back of a spoon or an offset spatula. Slide it into the oven and bake for 30 to 35 minutes, checking with a toothpick—it should come out clean with maybe one or two crumbs clinging to it.
- Cool with intention:
- Let the cake rest in the pan for 10 minutes (this helps it set and makes it less likely to crack or fall apart), then carefully turn it out onto a wire rack to cool completely. Rushing this step leads to a warm frosting disaster, so be patient even though you're excited.
- Prepare the frosting:
- Open your refrigerated coconut milk can carefully and spoon the thick, creamy top layer into a clean mixing bowl—save the liquid for smoothies or another project. Add maple syrup and vanilla, then beat with an electric mixer on medium-high speed for about 2 to 3 minutes until it becomes light, fluffy, and frosting-like.
- Frost and garnish:
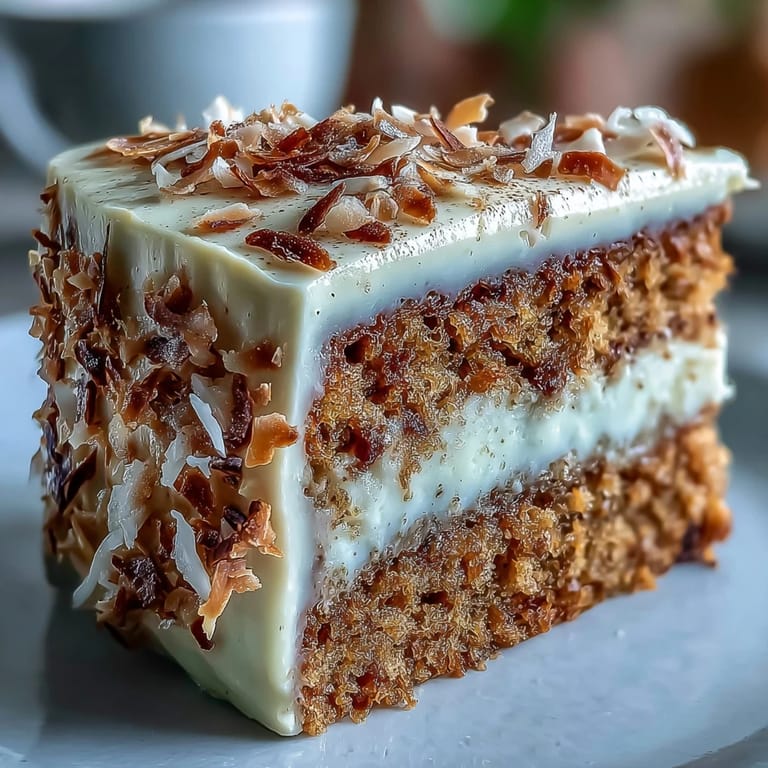
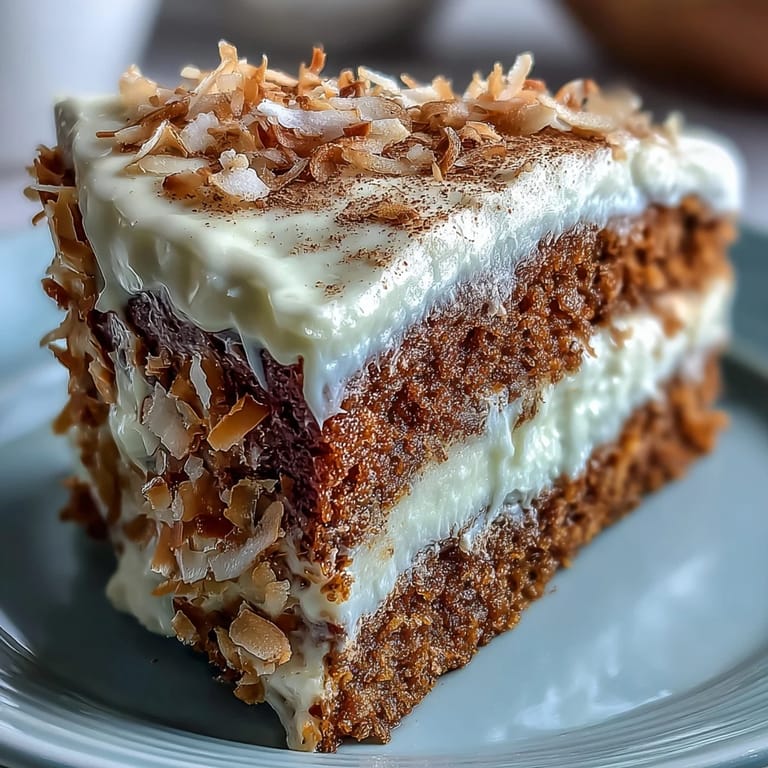
- Once the cake is completely cool, spread the coconut frosting evenly over the top using an offset spatula or the back of a spoon. Dust with hojicha powder and scatter toasted coconut flakes over the surface for a finish that looks as elegant as it tastes.
 Save to Pinterest
 There's something about serving a cake that tastes indulgent and refined but is actually good for you—it changes the energy of a gathering. People relax, they linger over their slice, and they often ask if they can take home the recipe written on a napkin.
The Hojicha Moment
Hojicha is roasted green tea, which means it has this deeper, almost toasted complexity that green tea doesn't have. When you bake it into a cake, it doesn't scream tea flavor—instead, it whispers in the background like a memory of autumn mornings or a quiet moment at a tea house. The flavor is sophisticated without being pretentious, which is exactly what makes this cake special.
Why This Works for Everyone
I used to worry that vegan baking meant sacrifice—drier cake, strange aftertaste, texture compromises. This recipe changed that entirely because almond flour and coconut oil do something that regular all-purpose flour can't do alone: they create moisture and tenderness that actually rival traditional cakes. Add the maple syrup's gentle sweetness and the hojicha's roasted depth, and suddenly you have something that doesn't feel like a substitute for anything.
Storage, Serving, and Pairing
This cake actually improves after a day in the refrigerator—the flavors settle and deepen, and the frosting firms up beautifully for clean slicing. Keep it covered in an airtight container in the fridge for up to three days, though honestly it rarely lasts that long once people discover it's in your kitchen.
- Pair it with matcha tea for a double hojicha moment, or serve alongside chamomile if you want something lighter and more delicate.
- A small slice with sake—something light-bodied and slightly sweet—creates an unexpectedly perfect pairing that feels refined and thoughtful.
- Leftovers are best eaten chilled directly from the refrigerator, where the frosting has the perfect consistency and the cake tastes almost like a sophisticated tea cake from a café.
 Save to Pinterest
 This cake became my go-to gift when friends told me they'd gone vegan or gluten-free, because it proves that removing certain ingredients doesn't mean removing joy from the table. It's become my quiet way of saying I see you, I'm thinking of you, and you deserve something delicious.
Common Recipe Questions
- → What does hojicha taste like?
Hojicha offers a distinctive earthy, roasted flavor with subtle caramel notes. Unlike green tea, it's steeped at higher temperatures which reduces bitterness and creates a warm, comforting taste profile that pairs beautifully with sweet frosting.
- → Can I use regular flour instead of gluten-free blend?
Yes, you can substitute the gluten-free flour blend with an equal amount of all-purpose wheat flour. The texture may be slightly different but will still yield a moist, flavorful cake with the same hojicha infusion.
- → Why must the coconut milk be refrigerated overnight?
Refrigerating coconut milk separates the solid cream from the liquid. Only the solid portion whips into a fluffy, stable frosting similar to traditional buttercream—essential for achieving that creamy, spreadable texture.
- → How do I know when the cake is done baking?
Insert a toothpick into the center of the cake. If it comes out clean or with just a few moist crumbs, the cake is ready. The edges should be lightly golden, and the cake should spring back when gently pressed.
- → Can I make this cake ahead of time?
Absolutely. Bake the cake layers up to two days in advance, wrap tightly, and store at room temperature. The frosting can be prepared separately and kept refrigerated. Assemble and frost the cake on the day you plan to serve it.