Save to Pinterest
 I'll never forget the Christmas Eve when my sister challenged me to make our holiday cheese board look like a winter wonderland. I spent hours arranging cheese and grapes, and honestly, my first attempt looked more like abstract art than anything festive. But then inspiration struck—what if I cut the cheese into thin triangles and arranged them like tiny pine trees all around the edges? The moment I stepped back and saw those golden triangles pointing outward with emerald grapes nestled between them, I knew we'd created something truly magical. That board became the star of our gathering, and guests couldn't stop talking about how we'd turned simple cheese into edible forest art. Now, every holiday season, someone asks me to make 'that famous Tannenbaum board.'
There was this one New Year's brunch when I made three different cheese boards for our potluck, and the Tannenbaum border was the only one that came home empty. A friend who's usually skeptical about fancy presentations actually asked if she could take a photo for her cookbook inspiration board. That moment, watching people light up when they realized the beautiful border was actually delicious cheese they could eat—that's when I understood this isn't just decoration, it's edible joy.
Ingredients
- Semi-firm cheese (Gouda, Edam, or Emmental), 250 g, well chilled: The cold is your secret weapon here. Warm cheese gets mushy and tears instead of slicing cleanly into those crisp triangles. I learned this the hard way when I tried slicing room-temperature Gouda and ended up with a crumbly mess. Chilling for at least an hour before slicing makes all the difference in getting those picture-perfect points.
- Small green seedless grapes, 150 g, washed and thoroughly dried: The drying step matters more than it sounds. Wet grapes slip around and won't nestle properly between your cheese triangles. I use a clean kitchen towel and pat them gently until they're completely dry. They become little jewels that catch the light and fill those gaps beautifully.
Tired of Takeout? 🥡
Get 10 meals you can make faster than delivery arrives. Seriously.
One email. No spam. Unsubscribe anytime.
Instructions
- Chill your cheese:
- Take your cheese block from the refrigerator and let it sit there for at least an hour. You want it so cold it's almost rigid—this is what makes slicing clean and easy rather than frustrating and crumbly. Think of it as giving your cheese a power nap before the big performance.
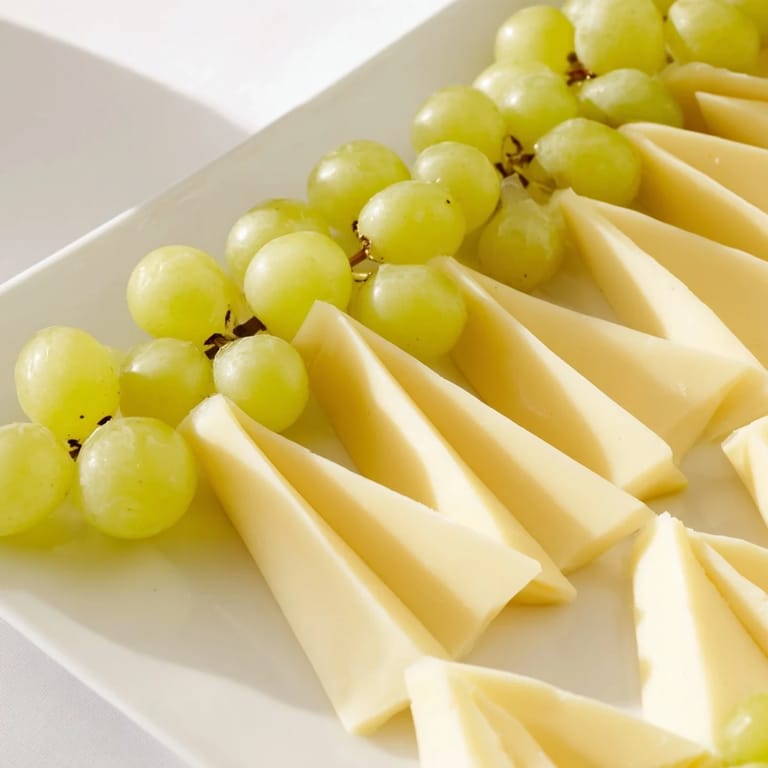
- Slice into pine tree shapes:
- Using a very sharp chef's knife, cut thin triangular slices approximately 5 to 6 centimeters long and about 1 centimeter wide at the base. Each slice should taper to a gentle point. The knife should glide through the cold cheese with barely any pressure—if you're sawing, your knife isn't sharp enough. Take your time here; wonky triangles are charming, but clean cuts make the magic happen.
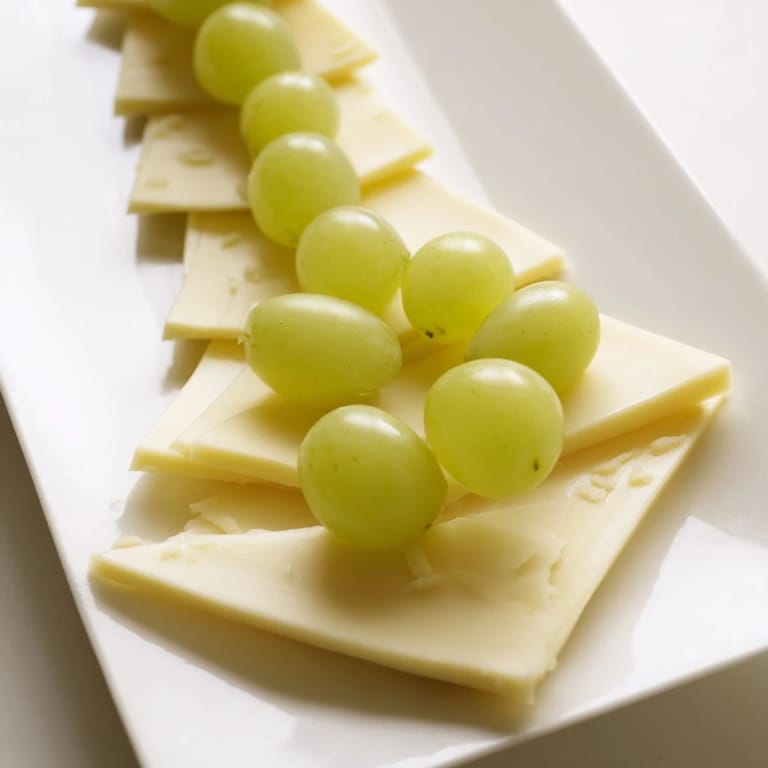
- Arrange your cheese forest:
- Imagine your board as a picture frame and the cheese triangles as a decorative border. Start at one corner and work your way around all four edges. Point each triangle outward, like little evergreens standing at attention. Vary the angles slightly so they don't look too uniform—nature's forests are a bit wild, after all.
- Nestle the grapes:
- Now comes the fun part. Take your perfectly dried grapes and gently tuck them into the spaces between and around your cheese triangles. They should look like they're nestled in a cheese forest, creating depth and filling any gaps. This is where the whole design comes together and starts looking like an actual winter scene.
- Complete your masterpiece:
- Step back and look at your border. Does it feel balanced? Are there any awkward gaps? Fill those with a few more grapes or adjust a cheese triangle. Then fill the center of your board with whatever cheeses, charcuterie, crackers, or accompaniments you'd like. The border frames everything beautifully.
 Save to Pinterest
 I think about my niece, who's five, asking if she could eat the 'pine trees' because they looked so real. When I told her they were actually cheese, her face transformed. She felt like she'd discovered treasure. That's the real magic of this board—it makes people happy before they've even tasted anything. Food that brings joy in more ways than one is worth the effort every single time.
Choosing Your Perfect Cheese
The beauty of this design is that you can play with different semi-firm cheeses and get entirely different flavor experiences. Gouda brings a subtle sweetness and creamy richness that feels fancy without being overwhelming. Edam is a bit more delicate and mild, perfect if you're feeding a crowd with varying cheese preferences. Emmental has those gorgeous little holes and a nuttier flavor that reminds me of Alpine mountain breakfasts. The key is that all three hold their shape when sliced cold and have that beautiful golden color that makes the border really glow under party lighting. I've also experimented with aged Manchego when I wanted something bolder, and it was stunning.
Making It Your Own
While the classic green-and-gold combination is gorgeous, this is actually the perfect template for playing with color. One December, I alternated in a few deep red grapes to look like holly berries, and it transformed the whole feeling of the board. Another time, I scattered pomegranate seeds between the triangles, which added a jewel-like sparkle and a little tartness that complemented the cheese perfectly. Fresh rosemary sprigs tucked around the edges really do look like pine needles and add an herbal whisper of scent. Holiday-themed crackers or seeded breads in the center complete the picture. This is your canvas—make it feel like your own celebration.
Timing and Preparation
The fifteen-minute timer starts with a properly chilled cheese block, so plan ahead. I usually slice my cheese the morning of my party, layer the triangles between parchment paper, and keep them in the refrigerator. The grapes get washed and dried a couple hours before guests arrive. Then, when it's about thirty minutes before people come through the door, I assemble the whole board. It takes maybe ten minutes with music playing, and suddenly you have something that looks like you spent the afternoon on it. That's the perfect recipe for looking effortlessly elegant.
- Slice your cheese the morning of if you're organized, or up to four hours ahead and keep it chilled between layers of parchment paper
- Don't assemble the final board more than thirty minutes before serving, or the cheese will soften slightly and lose that crisp, geometric precision
- Keep everything cold until the last possible moment—your presentation is only as good as your cheese's structural integrity
 Save to Pinterest
 Every time I make this board, I'm reminded that the most memorable food is the kind that makes people smile before they even taste it. The Tannenbaum border proves that you don't need hours in the kitchen or complicated techniques to create something truly special. It's just good cheese, thoughtful slicing, and a little imagination—which is really all any good cooking is about.
Common Recipe Questions
- → What type of cheese works best for the Tannenbaum border?
Semi-firm cheeses like Gouda, Edam, or Emmental are ideal because they hold shape well when sliced thinly into triangles.
- → How do I achieve the pine tree shape with cheese slices?
Slice the cheese into thin, triangular pieces about 5–6 cm long with a wide base, then arrange with points facing outward to mimic stylized pine trees.
- → Can I use other fruits besides green grapes?
Yes, small red grapes or pomegranate seeds can be alternated to add extra color and festive appeal.
- → What is the best way to arrange the grapes on the board?
Nestle the grapes between and around the cheese triangles, filling the gaps evenly to enhance the tree-like visual effect.
- → Are there suggestions for additional garnishes?
Fresh rosemary sprigs can be placed to add a pine needle texture, complementing the pine tree theme visually and aromatically.