 Save to Pinterest
 My sister handed me a crinkled printout of Betty Boop mid-wink and said, Make this edible. It was the week before her birthday, and she'd been obsessed with vintage cartoons since finding a box of our grandmother's old collectibles in the attic. I wasn't sure how to turn a sassy silhouette into cake decor, but the challenge stuck. That's how this red velvet heart cake with a dark chocolate Betty Boop cutout was born—half whimsy, half stubborn curiosity, and entirely worth the mess.
The first time I served this, my niece grabbed the chocolate Betty off the top before I could even slice it. She held it up like a trophy, grinning, and suddenly everyone wanted their own piece with a bit of that dark chocolate edge. I realized then that cakes don't just taste good—they create moments. This one always does.
Ingredients
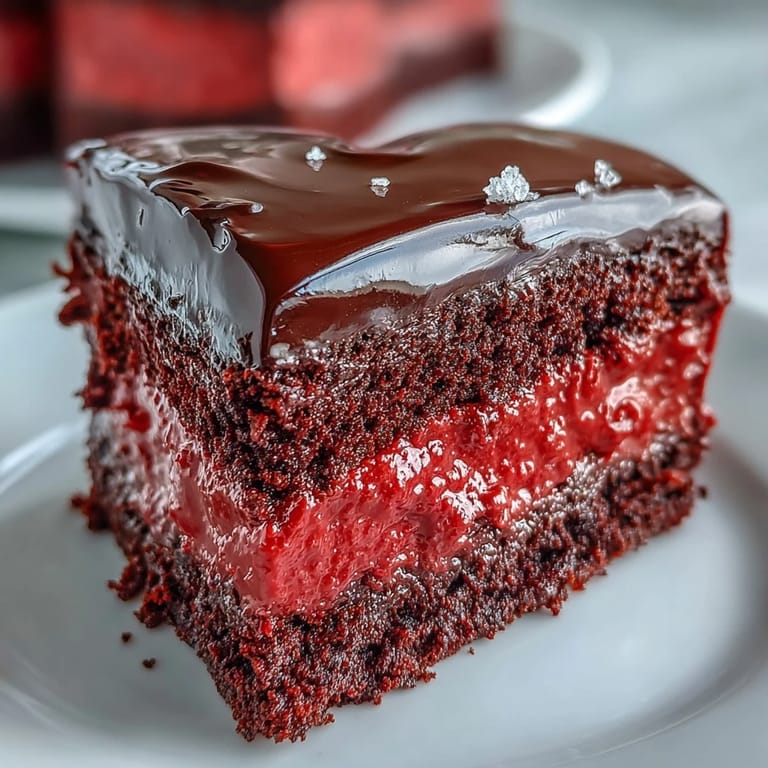
- Cake flour: Sifting it twice makes the crumb impossibly tender, and skipping this step will give you a denser texture.
- Natural unsweetened cocoa powder: Just enough to deepen the red without turning it brown, and it adds a subtle earthiness that balances the sweetness.
- Red gel food coloring: Liquid dyes water down the batter, but gel keeps the color vivid and the consistency perfect.
- Buttermilk: The acidity reacts with baking soda to create lift and a gentle tang that cuts through the richness.
- White vinegar: It activates the baking soda at the last second, giving the cake that classic red velvet fluff.
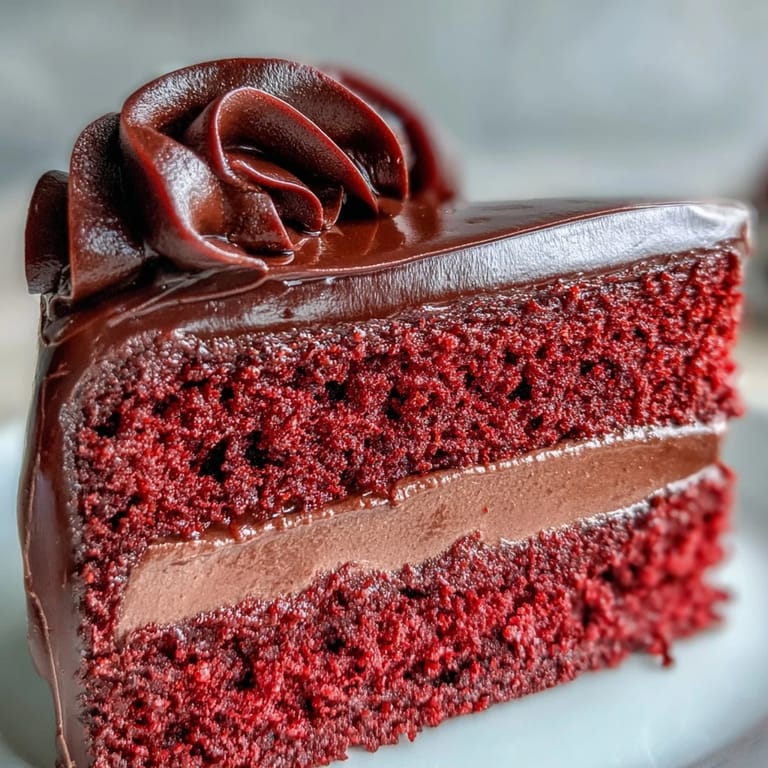
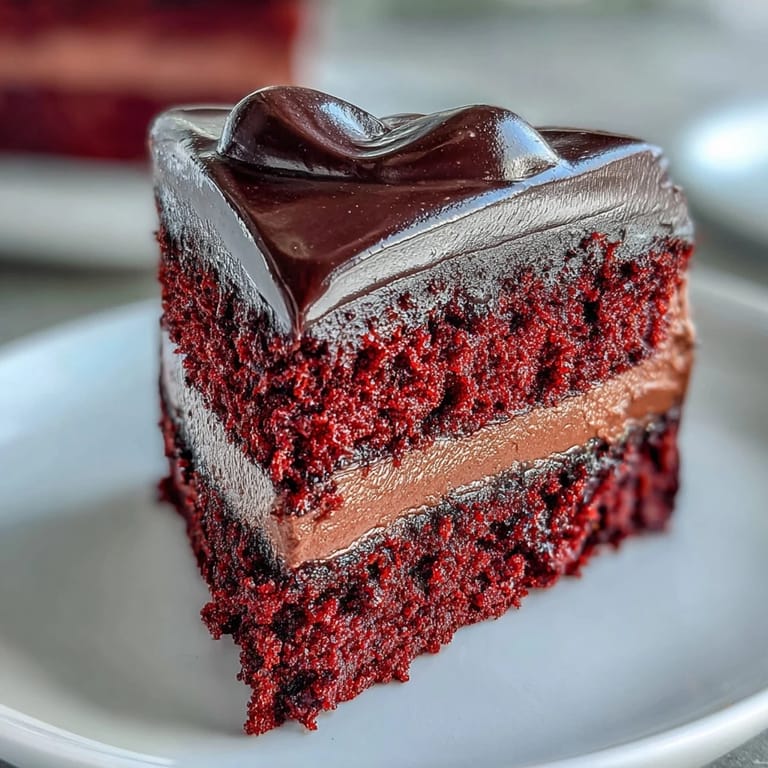
- Cream cheese: Must be room temperature or it'll clump, and those lumps never smooth out no matter how long you beat it.
- Dark chocolate: I prefer it over candy melts for the silhouette because it snaps cleanly and tastes like real chocolate, not wax.
Tired of Takeout? 🥡
Get 10 meals you can make faster than delivery arrives. Seriously.
One email. No spam. Unsubscribe anytime.
Instructions
- Prep your pans:
- Grease them well and line the bottoms with parchment, especially the curves of the heart shape where batter loves to stick. I learned this after prying out a half-crumbled layer with a spatula and a lot of regret.
- Mix the dry base:
- Whisk the flour, cocoa, baking powder, baking soda, and salt together until no streaks remain. This ensures even distribution so you don't get pockets of salty or bitter bites.
- Cream butter and sugar:
- Beat them on medium speed until the mixture looks pale and fluffy, like whipped clouds. This step traps air, which gives the cake its lift.
- Add eggs slowly:
- One at a time, letting each one blend in before adding the next. Rushing this can cause the batter to split and lose its silky texture.
- Tint the batter:
- Stir in the red gel, vanilla, and vinegar until the color is uniform and bold. It'll look almost too red, but baking mellows it into that classic velvet hue.
- Alternate dry and wet:
- Add dry ingredients in three parts, buttermilk in two, starting and ending with dry. Mix just until you can't see flour anymore—overmixing makes the cake tough.
- Activate the soda:
- Combine vinegar and baking soda in a small cup, watch it fizz, then fold it gently into the batter. This is the magic that makes the crumb light and tender.
- Bake evenly:
- Divide the batter between pans, smooth the tops, and bake on the center rack. The cakes are done when a toothpick comes out clean and the edges just start to pull away from the pan.
- Cool completely:
- Let them rest in the pans for 10 minutes, then turn out onto racks. Frosting warm cake melts the frosting into a sad puddle, trust me.
- Whip the frosting:
- Beat cream cheese and butter until smooth, then add powdered sugar slowly so it doesn't puff into a cloud. Finish with vanilla and a pinch of salt for balance.
- Layer and chill:
- Spread frosting on the first layer, top with the second, then refrigerate to firm up. This crumb coat step keeps stray crumbs from ruining your final finish.
- Smooth the final coat:
- Apply a thicker layer of frosting and use an offset spatula to create swirls or a clean surface. A warm spatula glides easier and leaves fewer drag marks.
- Pipe the silhouette:
- Trace your Betty Boop stencil with melted chocolate on parchment, let it set until firm, then peel it off carefully. If it cracks, pop it in the fridge for a minute to harden more.
- Place and chill:
- Press the chocolate gently onto the frosted cake, add any extra decorations, and chill for 30 minutes. Slice with a warm knife for clean edges and perfect heart slices.
 Save to Pinterest
 I once made this cake on a rainy Sunday when the power flickered halfway through baking. I held my breath until the oven beeped, and somehow the layers came out perfect—fluffy, red, and fragrant. My husband said it tasted like luck. I think it tasted like relief, but either way, it became our weather-the-storm cake after that.
Getting the Color Just Right
The first time I used liquid food coloring, the batter turned pink and runny, and the cake baked up more salmon than scarlet. Gel coloring is the only way to get that deep, vibrant red without throwing off the moisture balance. Start with two tablespoons and add more if needed, but remember it darkens slightly as it bakes.
Making the Chocolate Silhouette
I print the stencil at about 5 inches tall so it sits centered on the heart without overwhelming the cake. Slide it under parchment, trace with melted chocolate using a piping bag or a squeeze bottle, and let it harden completely before peeling. If the chocolate is too thin, it'll shatter when you lift it, so pipe a slightly thicker line than you think you need.
Storing and Serving
This cake keeps beautifully in the fridge for up to four days, covered loosely so the frosting doesn't stick to the wrap. Let it sit at room temperature for about 20 minutes before serving so the frosting softens and the flavors bloom. If you're transporting it, chill it fully first so the silhouette doesn't slide off in the car.
- Warm your knife under hot water between slices for clean cuts through the chocolate and frosting.
- Leftover frosting can be piped into rosettes and frozen on parchment for quick cupcake toppers later.
- If you don't have heart-shaped pans, bake in two 9-inch rounds and cut them into hearts with a template.
 Save to Pinterest
 Every time I lift that chocolate silhouette onto the frosting, I think of my sister's crinkled printout and her challenge to make Betty edible. This cake is proof that the best recipes come from someone daring you to try something new.
Common Recipe Questions
- → Can I use regular cocoa powder instead of natural unsweetened?
Yes, but natural unsweetened cocoa powder works best for maintaining the vibrant red color. Dutch-processed cocoa may darken the batter and dull the red hue.
- → What if I don't have heart-shaped pans?
You can use two 9-inch round pans and carve the cakes into heart shapes after cooling, or simply keep them round and add the chocolate decoration on top.
- → How do I prevent the chocolate silhouette from breaking?
Work with slightly thicker chocolate layers and let them set completely before peeling from parchment. Handle gently and keep at cool room temperature until placing on the cake.
- → Can I make this cake ahead of time?
Absolutely. Bake and frost the cake up to 2 days ahead, store covered in the refrigerator, and add the chocolate decoration a few hours before serving for best results.
- → Why add vinegar to the batter?
Vinegar reacts with baking soda to create extra lift and a tender, fluffy crumb. It also enhances the tangy buttermilk flavor that complements the cream cheese frosting.
- → Can I use a different frosting?
Yes, but cream cheese frosting provides the classic tangy balance to the sweet red cake. Buttercream or whipped cream can work, though the flavor profile will differ.