Save to Pinterest
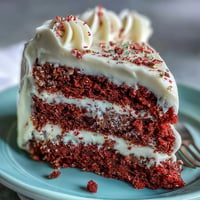
 The kitchen counters were buried under powdered sugar snow, and I honestly could not stop grinning. My niece had begged for a Betty Boop cake for her birthday, and what started as an intimidating challenge turned into one of the most fun afternoons I've had baking in years. Something about that iconic black hair and those oversized white eyes just makes everything feel playful and a little bit mischievous.
When my sister walked into the kitchen and saw me carefully cutting out tiny fondant eyelashes with a paring knife, she laughed so hard she had to lean against the counter. But when that cake came out at the party, even the adults were gathering around with their phones, taking pictures like paparazzi. It is amazing how a cartoon character from the 1930s can still stop a room full of people in their tracks.
Ingredients
- All-purpose flour: Provides structure for those tall layers while keeping the crumb tender and delicate
- Granulated sugar: Sweetens and helps create that signature velvet texture by creaming with butter
- Baking powder: Gives the cake its lift so each layer rises evenly without doming too much
- Salt: Balances sweetness and enhances all the other flavors in the batter
- Unsalted butter: Room temperature butter is non-negotiable for proper aeration and smooth texture
- Large eggs: Bring structure and richness while helping bind everything together
- Whole milk: Adds moisture and creates a tender crumb that lasts for days
- Vanilla extract: Deepens the flavor profile so the cake tastes as good as it looks
- Red gel food coloring: Gel coloring delivers that intense red without adding excess liquid
- Cream cheese: The star of the buttercream, bringing that signature tang we all love
- More unsalted butter: Creams with the cheese for a frosting that spreads like silk
- Powdered sugar: Sweetens the frosting while creating that smooth pipeable consistency
- Black fondant: Essential for Betty's iconic hairstyle that makes her instantly recognizable
- White fondant: Forms those expressive eyes that give the cake its personality
- Red fondant: Creates those perfect lips that complete Betty's look
- Edible pearl dust: Adds a subtle shimmer that makes the decoration feel extra special
- Cornstarch: Keeps fondant from sticking to your work surface while rolling
Tired of Takeout? 🥡
Get 10 meals you can make faster than delivery arrives. Seriously.
One email. No spam. Unsubscribe anytime.
Instructions
- Get your oven ready:
- Preheat to 350°F and grease two 8-inch round pans, lining bottoms with parchment paper for easy release
- Whisk the dry ingredients:
- Combine flour, baking powder, and salt in a medium bowl, setting it aside while you prep the wet ingredients
- Cream butter and sugar:
- Beat together on medium speed for about 3 minutes until the mixture looks pale and fluffy like whipped cream
- Add the eggs:
- Drop them in one at a time, letting each incorporate fully before adding the next, then stir in vanilla
- Combine wet and dry:
- Alternate adding flour mixture and milk in three additions, starting and ending with flour while scraping the bowl
- Make it red:
- Mix in gel food coloring a little at a time until you reach that deep, dramatic red we are after
- Bake the layers:
- Divide batter between pans and bake for 25 to 30 minutes, rotating halfway through until a tester comes out clean
- Cool completely:
- Let cakes rest 10 minutes in pans, then flip onto wire racks to cool entirely before frosting
- Make the buttercream:
- Beat cream cheese and butter smooth, then gradually add powdered sugar until fluffy and spreadable
- Assemble the cake:
- Trim domes level, stack layers with buttercream between, then apply a crumb coat and chill for 20 minutes
- Frost smoothly:
- Apply the final coat of buttercream, using a scraper to create perfectly smooth sides and top
- Create the hair:
- Roll black fondant thin, cut Betty's silhouette, and drape over the front of the chilled cake
- Add the face:
- Attach white fondant eyes and red lips with small dabs of buttercream, positioning carefully
- Finish the details:
- Add eyelashes, eyebrows, and the red headband, then let everything rest 30 minutes before serving
 Save to Pinterest
 My niece kept coming into the kitchen every ten minutes to check on the cake's progress, her eyes widening every time she saw another element come together. When I finally placed those white fondant eyes on the black hair silhouette, she actually gasped. That moment right there made every fiddly step worth it.
Making Fondant Work For You
I used to be terrified of fondant until I realized it behaves exactly like Play-Doh. Keep your hands lightly dusted with cornstarch, work quickly, and do not stress about tiny imperfections because those just make it look more handmade and charming. The black fondant can be stubborn, so warming it slightly in your hands helps it become more pliable.
Perfect Red Velvet Every Time
The secret to red velvet that actually tastes good is not overdoing the food coloring. Gel coloring is concentrated, so start with less than you think you need. Room temperature ingredients are non-negotiable here, cold eggs or butter will not incorporate properly and you will end up with a dense cake instead of that tender crumb we want.
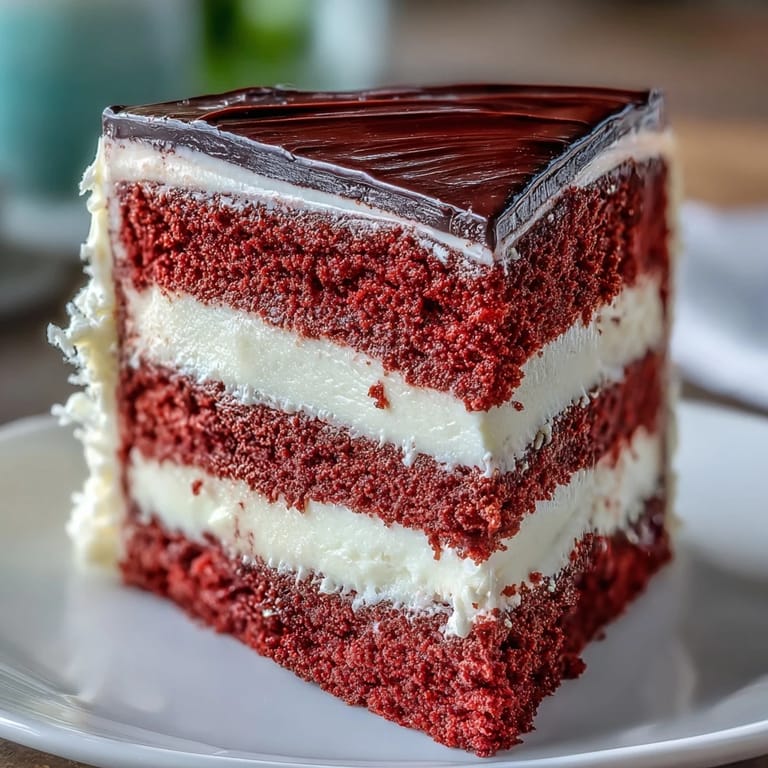
Assembly Made Simple
Take your time with the crumb coat because that thin layer locks in all those loose crumbs and creates a pristine canvas for your final coat. Chill the cake for at least 20 minutes, but do not let it get so cold that the buttercream becomes hard to work with. When applying the final coat, heat your offset spatula under hot water and dry it off for the smoothest finish possible.
- Print a Betty Boop silhouette template to trace onto the fondant if freehand cutting feels intimidating
- Keep a small bowl of water nearby to fix fondant cracks or seal seams where pieces join
- Clean your hands frequently when working with multiple fondant colors to prevent color transfer
 Save to Pinterest
 Slice into this cake and watch the room light up, because nothing beats the combination of nostalgic red velvet and a cartoon icon who has been making people smile for nearly a century.
Common Recipe Questions
- → Can I make this cake ahead of time?
Yes, bake the cake layers up to two days in advance and wrap them tightly in plastic wrap. Store at room temperature or refrigerate. Prepare fondant decorations a day ahead and keep in an airtight container. Assemble and decorate the day of serving for best results.
- → What can I use instead of fondant?
You can use buttercream piping to create the facial features instead of fondant. Pipe black buttercream for hair and eyelashes, white for eyes, and red for lips. Alternatively, use molding chocolate or marzipan for a different texture and flavor.
- → How do I get the red color vibrant without using too much food coloring?
Use gel food coloring instead of liquid, as it provides intense color without thinning the batter. Start with one tablespoon and add more gradually until you achieve the desired depth. The color will deepen slightly during baking.
- → Can I substitute the cream cheese buttercream?
Yes, Swiss meringue buttercream offers a lighter, silkier alternative. Traditional American buttercream also works well. For a dairy-free option, use vegan cream cheese and butter substitutes, though the texture may vary slightly.
- → How should I store leftover cake?
Store the decorated cake in an airtight container at room temperature for up to two days, or refrigerate for up to five days. Fondant may sweat when transitioning from cold to room temperature, so allow the cake to sit at room temperature for 30 minutes before serving.
- → Do I need special tools to work with fondant?
Basic tools include a rolling pin, sharp knife or pizza cutter, and cornstarch for dusting. Fondant smoothers and shape cutters make the process easier but aren't essential. You can create shapes freehand or use household items like cookie cutters and toothpicks for details.