Save to Pinterest
 When I first decided to make a rainbow jelly cake with agar-agar and coconut cream, my kitchen erupted into a scene straight out of a paintbox. The anticipation of seeing those translucent layers build up, each one echoing a different hue, made me giddy rather than nervous. The kettle hissed, the scent of sweet coconut drifted over the counter, and I found myself fascinated by how something so simple could look so spectacular. It wasn’t about re-creating a childhood memory but about chasing that thrill of a perfect reveal. Sometimes making dessert feels less like following a recipe and more like conducting a tiny science experiment with delicious results.
The last time I put this cake together it was midsummer and guests were arriving just as the final layer was setting. My sister hovered beside the fridge, convinced she could see the colors getting brighter as they cooled. I laughed because my own fingers were sticky from earlier, proof that layering means stealing tastes along the way. We joked about who could get the cleanest slice, but everyone agreed the wobbly, jewel-toned slices were too pretty to last long. That day, I realized this rainbow cake always steals the scene, no matter who’s around the table.
Ingredients
- Agar-agar powder: To set the jellies firmly—heating it thoroughly is key to avoid any graininess.
- Water: Used for blooming agar-agar and thinning the coconut cream layer, always use filtered water for a clean flavor.
- Granulated sugar: Sweetens the layers just enough; you can adjust slightly if you prefer less sweetness (I sometimes go a bit light in summer).
- Food colorings (red, orange, yellow, green, blue, purple): The fun part—use vibrant gel colors for a brighter cake, or natural ones if you prefer a softer look.
- Vanilla extract (optional): Adds a warm undertone, but you can skip it if you want the coconut to shine.
- Coconut cream: For that rich, tropical top—a whisk before using makes it extra smooth.
- Pinch of salt: Never underestimate the pop it gives to the coconut layer, balancing all the sweetness.
Tired of Takeout? 🥡
Get 10 meals you can make faster than delivery arrives. Seriously.
One email. No spam. Unsubscribe anytime.
Instructions
- Make the Jelly Base:
- Combine agar-agar powder with water in a medium saucepan and bring to a gentle boil over medium heat. Stir constantly until the powder fully dissolves, the mixture will become clear and slightly thick after a few minutes.
- Sweeten and Flavor:
- Add sugar and, if you like, a splash of vanilla, stirring until the sugar has melted in completely.
- Color Divide:
- Remove from heat then carefully pour the hot mixture into six separate heatproof bowls. Mix in a few drops of color to each bowl, adjusting until you get your ideal shades of rainbow.
- Layer the Mold:
- Pour the red jelly into your mold and let it cool until it’s just set but still slightly tacky to the touch. Follow with each color in turn, being patient—if you rush, the colors can bleed, but each layer only takes a few minutes to set.
- Prepare Coconut Cream:
- In a clean pan, combine more agar-agar powder with water and coconut cream. As it simmers, keep stirring, then add sugar and salt, blending until smooth and creamy with the softest scent of coconut rising up.
- Top It Off:
- When the last color layer has set, gently pour the warm coconut mixture over the top. The white cream will spread naturally and settle smooth if you go slowly.
- Chill Completely:
- Let the whole cake cool to room temperature, then refrigerate until set through—it will become firmer and easier to slice as it chills.
- Serve and Enjoy:
- Loosen the sides with a thin spatula or knife, invert gently, and slice into slabs or cubes. The first bite is always wobbly and fresh, with coconut filling in every gap between the colors.
 Save to Pinterest
 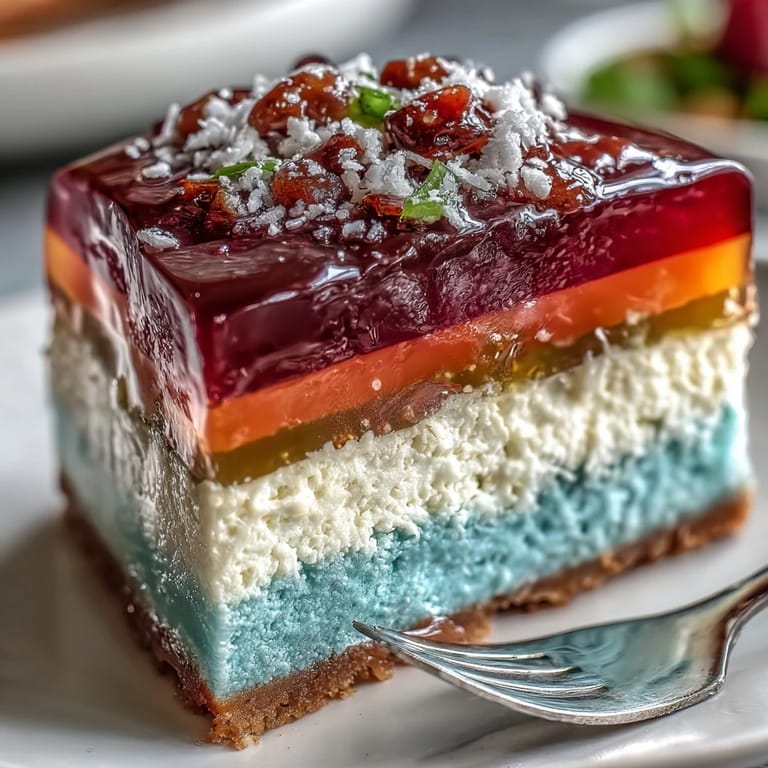 Save to Pinterest
 One of my favorite moments was the first time someone called this cake “edible stained glass” and snapped a dozen photos before taking a bite. There’s something satisfying about watching people marvel at the colors, then close their eyes to savor the cool coconut and gentle chew. It turns dessert into a little celebration, whether it’s for a picnic or just to brighten up a gray weekend.
Making It Your Own: Color and Flavor Twists
After a few rounds, I started experimenting with natural colors—beet juice, turmeric, matcha, even a hint of butterfly pea flower for blue. Pandan and rose extracts give the layers gentle floral notes, and on days when I craved more subtlety, I’d use less sugar and let coconut take center stage. It’s a flexible recipe—no two cakes ever turn out exactly alike, and that’s half the fun.
Tricks for Perfect Layering Every Time
Keep your layers neat by pouring each colored jelly when it’s still warm but just thickened—not hot, or it’ll melt the last one, and not cold, or it’ll set before you smooth it out. Run a spatula along the mold edge after each color to keep lines tidy. And if you spill or a layer dries wonky, just call it a modern art piece—no one minds, especially once they taste it.
Serving, Storing, and Sharing
Chilling the finished cake transforms every bite—what starts as delicate and jiggly becomes firm and refreshingly cool after a rest in the fridge. Slices keep their colors best if stored covered, and they’re just as good the next day for midnight snacking or breakfast (no judgment!).
- Use a wet knife for the cleanest slices.
- Let the cake come to room temperature for 10 minutes if it's too cold to cut.
- Layers are more vibrant if you use clear molds instead of metal ones.
 Save to Pinterest
 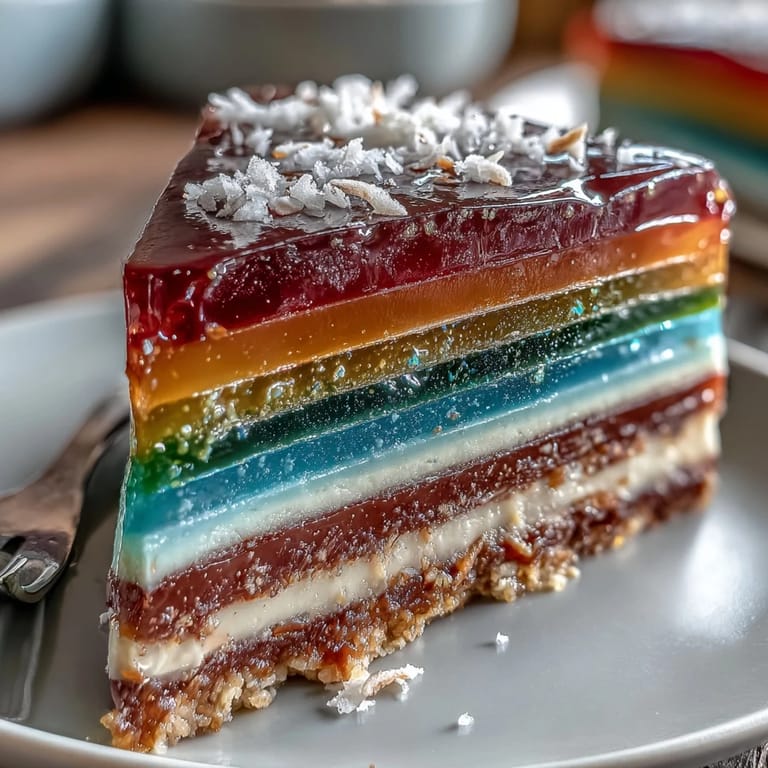 Save to Pinterest
 Whether it’s for a summer celebration or just a burst of color on a drab day, this rainbow jelly cake is pure fun in every slice. Serve it with laughter and watch the whole table light up.
Common Recipe Questions
- → How much agar-agar is needed for the layers?
Use 2 tablespoons (≈16 g) agar-agar with 900 ml water for the colored jelly base, and another 2 tablespoons (≈16 g) with 400 ml coconut cream plus 200 ml water for the coconut layer. Accurate measurements ensure firm, stable layers.
- → How long should each layer set before pouring the next?
Let each colored layer cool for about 5–8 minutes until just set but still slightly tacky. That brief setting prevents colors from blending while allowing good adhesion between bands.
- → Best food coloring and flavor tips?
Choose natural colorings or concentrated gel colors for vivid hues without watering down the mix. Add mild extracts like pandan or rose sparingly to maintain clear colors and a balanced flavor profile.
- → What mold and pouring technique works best?
Use a 20 cm round or rectangular mold. Pour slowly and close to the surface to avoid splashing into previous layers. If needed, cool the hot agar briefly so it doesn’t melt the layer below.
- → How should I chill and slice the finished cake?
Refrigerate at least 1 hour until fully firm. To slice neat portions, chill thoroughly, warm a knife under hot water, wipe dry, and make clean, single strokes.
- → Can I make substitutions for dietary needs?
This version is already dairy-free and gluten-free. For vegan assurance, use vegan-certified agar-agar and verify sugar and colorant labels. Coconut cream yields the best silky finish; lighter coconut milk may be less set.