 Save to Pinterest
 I'll never forget the autumn afternoon when my niece burst into the kitchen asking if we could make a pumpkin patch we could actually eat. She'd been drawing little pumpkins all week, and I realized we had everything we needed in the pantry—those bright orange cheese balls, some pretzels, and fresh herbs. Within minutes, we'd transformed a plain platter into something magical, and watching her carefully arrange each tiny pumpkin like she was tending a real garden reminded me why I love cooking for celebrations.
That first Halloween party where we brought the Pumpkin Patch Grid, something unexpected happened. The kids didn't just grab and go—they stood around talking about which pumpkins to pick first, creating this little moment of joy. One grandmother told me it reminded her of taking her own daughter to actual pumpkin patches decades ago. That's when I realized this wasn't just a snack; it was a conversation starter.
Ingredients
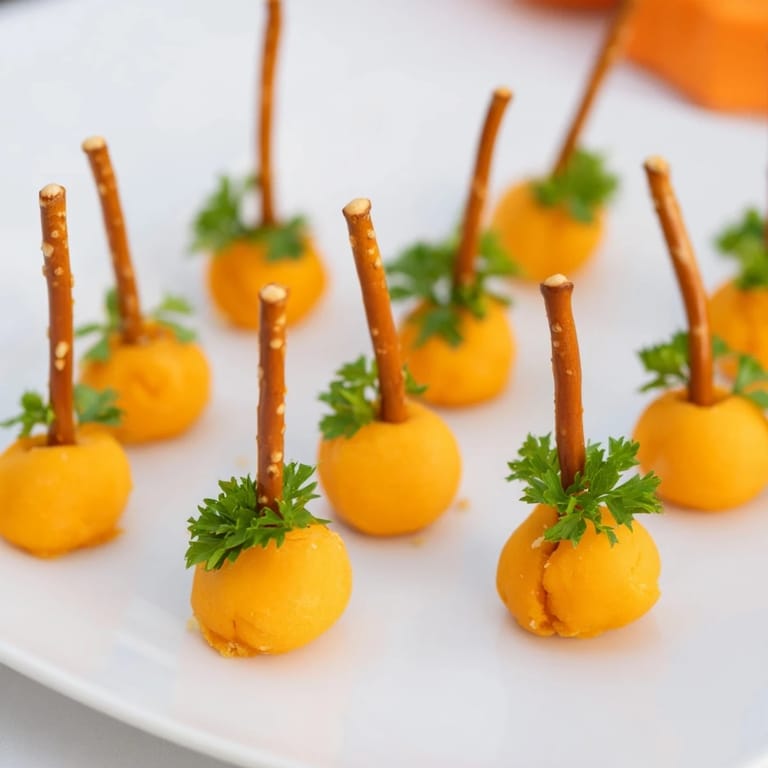
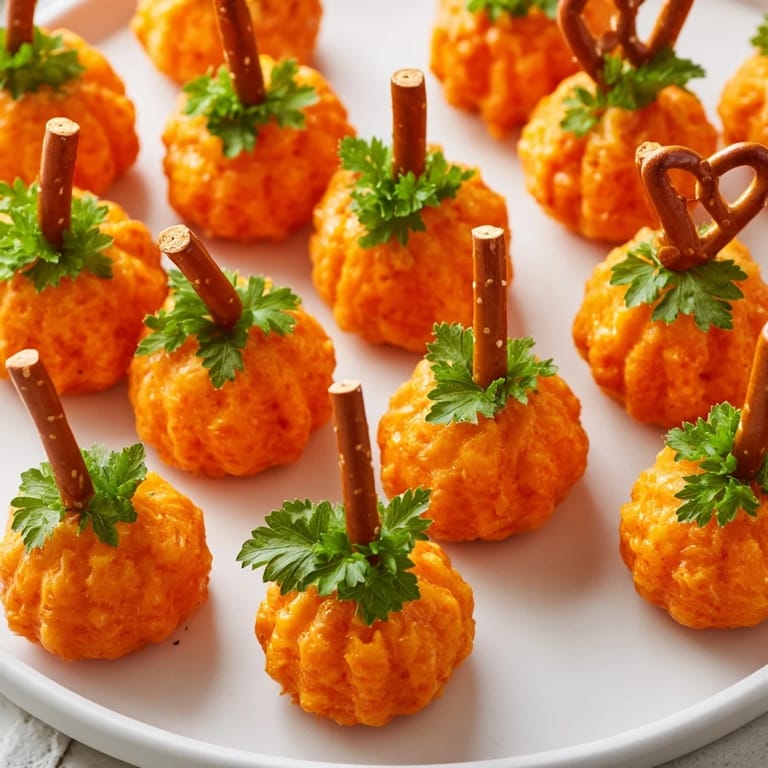
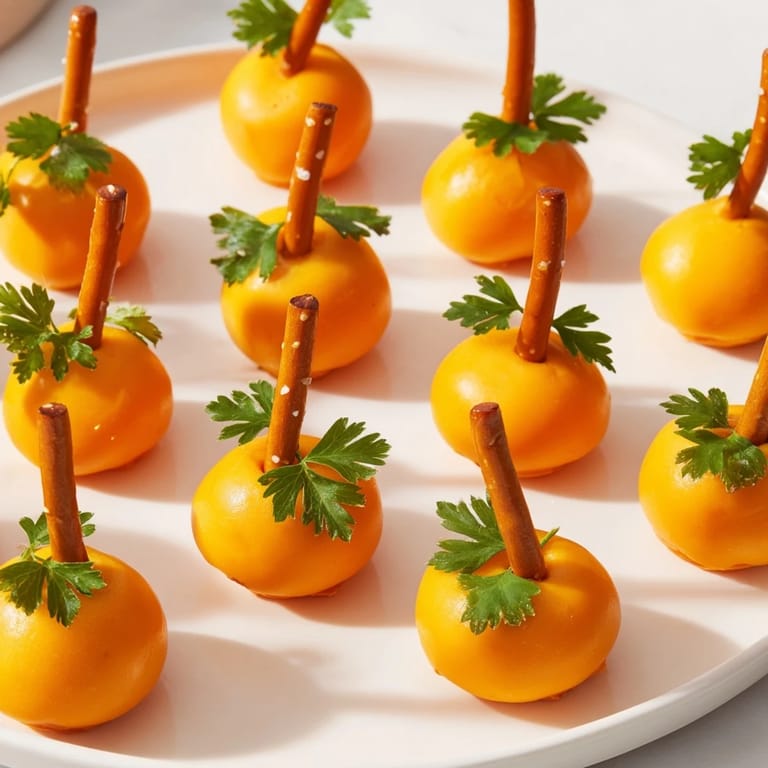
- 24 small orange cheese balls: These are your pumpkins, and they're the hero of this platter. I prefer the baked versions over fried because they hold their shape beautifully and feel less greasy in your hands. Look for good quality cheddar cheese balls—they're usually in the snack aisle, and having that slight savory tang is essential to the flavor.
- 24 small pretzel stick pieces, about 1 inch long: These become your stems, and breaking them yourself gives you control over the size. I learned the hard way that oversized stems topple easily, so smaller pieces work better. The salt on the pretzel adds a lovely contrast to the cheese.
- 2 tablespoons fresh parsley or chives: These are your leaves, and they bring a whisper of green that makes everything feel more garden-like. Fresh herbs matter here—they wilt slightly as they sit, but that's actually charming. You can skip them if you're in a rush, but they're worth the effort.
- Fresh baby spinach or green lettuce: This creates your field, and it's a beautiful base that makes the orange pumpkins really pop visually. It also keeps the cheese balls from rolling around on a smooth platter.
Tired of Takeout? 🥡
Get 10 meals you can make faster than delivery arrives. Seriously.
One email. No spam. Unsubscribe anytime.
Instructions
- Create your pumpkin patch foundation:
- Spread a generous layer of fresh spinach or lettuce across your serving tray, letting it ripple naturally. You want enough to cushion your pumpkins but not so much that it looks overwhelming. Pat it down gently so you have a stable base—think of this as preparing your garden soil.
- Arrange your pumpkins in a perfect grid:
- Place each cheese ball in neat, even rows on top of the greens. Stand back and look at your spacing; they should feel orderly like they're sitting in a real patch. I usually aim for 4 rows of 6, but whatever feels balanced to your eye works perfectly. Leave a tiny bit of green showing between each pumpkin so they don't crowd each other.
- Add stems with intention:
- Take each pretzel piece and gently push it into the top of a cheese ball. You want it to stand upright and proud—this is what makes them look like real pumpkins. Press firmly but not so hard that you crack the cheese ball. If one doesn't hold, try a different spot on top; every ball has a sweet spot.
- Garnish with leaves if you wish:
- Tuck a small parsley leaf or snippet of chive next to each stem. You're not trying to be perfect here; nature isn't perfect, and a little casual arrangement looks more authentic. Some people skip this entirely, and it's still beautiful, but I find those green touches add character.
- Serve right away:
- This is best enjoyed fresh, before anything starts to soften or the greens begin to wilt. Set it out when your guests arrive, and watch their faces light up.
 Save to Pinterest
 There was a moment at that Halloween party when an elderly neighbor picked up one of these little pumpkins and smiled, telling me she'd grown up on a farm. She said this was the most clever thing she'd seen in years, and suddenly it felt like the whole thing meant something bigger—like we were celebrating not just autumn, but memories and tradition in the simplest, most joyful way.
Making It Your Own
Once you understand the basic concept, this platter becomes your canvas. I've seen people use mini mozzarella balls rolled in paprika for a different texture, and it works beautifully. Sweet versions with mandarin segments are wonderful for those who prefer fruit over savory, and honestly, mixing both on the same platter creates an interesting contrast. The magic is in the arrangement and the spirit—the details can shift based on what you love.
Serving and Storage
This is definitely a make-it-fresh, serve-it-now kind of appetizer. The cheese balls stay best at room temperature, and the greens will start to wilt after a couple of hours, which is fine but not as visually striking. If you're making this for a longer event, you can assemble it shortly before guests arrive. I wouldn't recommend refrigerating it—the cheese can get hard and lose its appealing texture.
Perfect Pairings and Party Ideas
This snack feels right at home at Halloween parties, fall celebrations, or anytime you want something festive without the fuss. I love serving it alongside apple cider, sparkling grape juice, or even spiced lemonade. It pairs naturally with other autumn appetizers—think roasted nuts, pumpkin bread, or cheese and crackers. What I've learned is that this works best when it's the eye-catching centerpiece of a snack spread, something people notice and get excited about before they even taste it. The presentation is half the appeal.
- Set it out early so guests see it when they arrive—visual excitement makes for great memories
- Keep extra cheese balls and pretzels nearby in case the platter empties faster than expected
- This doubles easily if you're feeding a crowd; just prep two platters instead of getting stressed about portions
 Save to Pinterest
 This little platter has taught me that the best party moments aren't always about complicated dishes or fancy techniques—they're about creating something that brings people together and makes them smile. I hope your kitchen gets its own pumpkin patch story.